Elements and options of admin dashboard

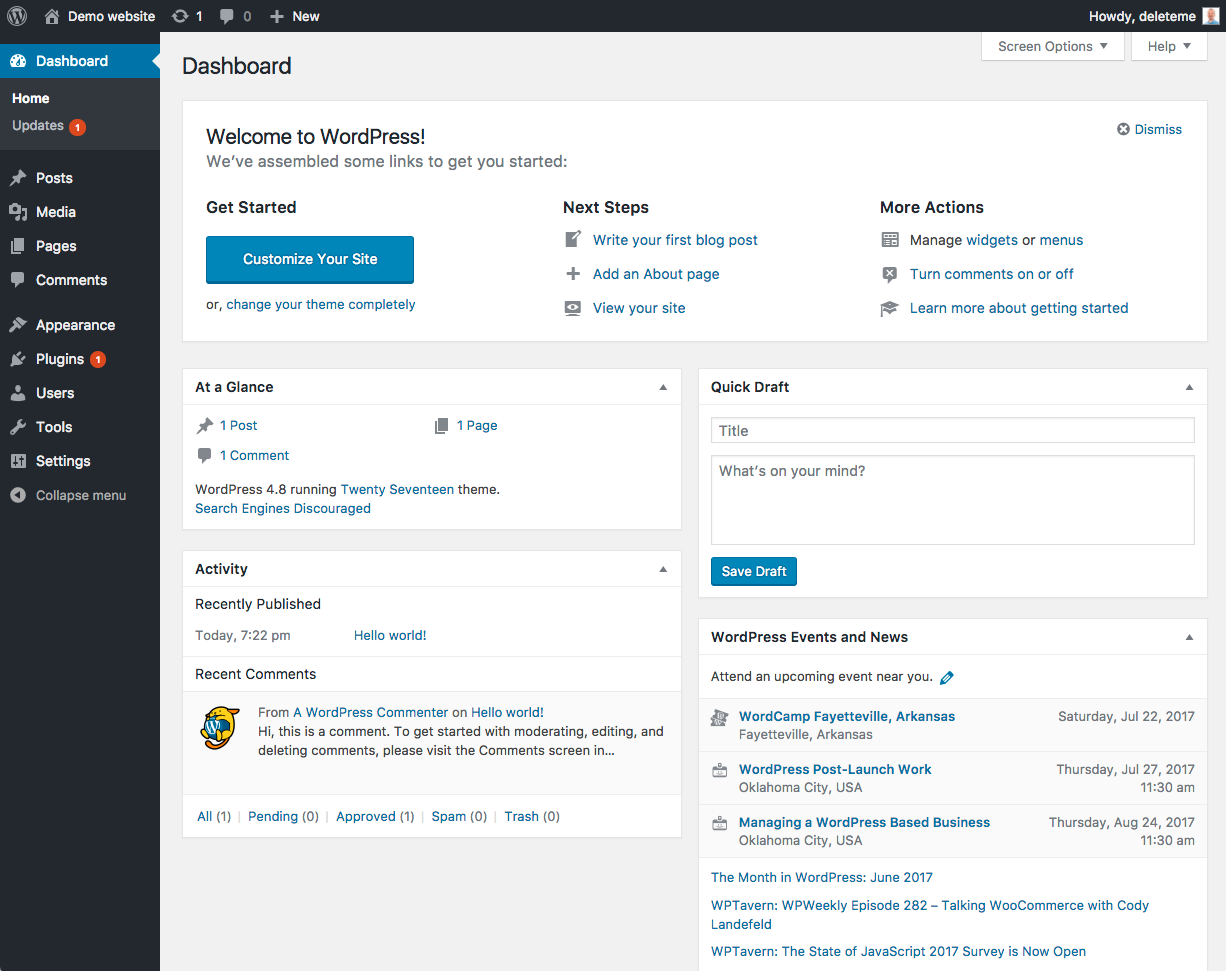
The Administration Screen provides access to the control features of your WordPress installation. Each Administration Screen is presented in sections, the toolbar (and header), the main navigation, the work area, and the footer.
Formerly known as the Admin Bar, the Toolbar has links to various administration functions, and is displayed at the top of each Administration Screen. Many Toolbar items expand (flyout) when hovered over to display more information.
On the left side of the screen is the main navigation menu detailing each of the administrative functions you can perform. At the bottom of that section is a Collapse menu button that shrinks the menu into a set of icons, or to expands to list them by major function. Within each major function, such as Posts, the sub-menu expands (fly-out) when hovered over, and expands fully if an item clicked.
The large area in the middle of the screen is the work area. It is here the specific information relating to a particular navigation choice, such as adding a new post, is presented and collected.
Finally, in the footer, at the bottom of each Administration Screen in light shading, are links to WordPress, thanking you for using it, and the version of WordPress you have installed is shown.
Each Screen that is accessed via the main navigation menu is presented in the boxes below. The links in those boxes will lead you to sections of this article describing those Screens. From those sections, you can navigate to articles detailing more information about each Screen.
Few screen shots have been listed
The login screen
The Dashboard
The administration system in WordPress works well enough at first glance. The built-in menu functions take care of a lot of the issues such as adding and removing menu items, but you may want to learn more about how WordPress handles its menus internally to leverage more control. The example below will show how you can implement a plugin which enables you to reorder the menu items in the order you wish while explaining the nuances of the WordPress menu system.
How WordPress orders Menu Items
To best show how the position of a menu item can cause problems, let’s create a small plugin to demonstrate the way in which WordPress orders menu items when adding them.
Create a directory in the plugins directory, such as
The WordPress documentation advises that adding admin pages should be done with the admin_menu action hook, so add this directly under the descriptor.
The easiest way to add a menu item to the administration panel is with the add_menu_page() function which takes seven arguments:
- text that is displayed in the title of the page
- the text of the menu item which is used in displaying the menu item
- the capability that you define to allow access to this menu item
- a menu slug identifier which identifies this menu from any other in the system
- a function which renders the page in the browser
- the path to an icon which is used to display with the menu, and
-
the position that the new menu item should appear in relation to other menu items