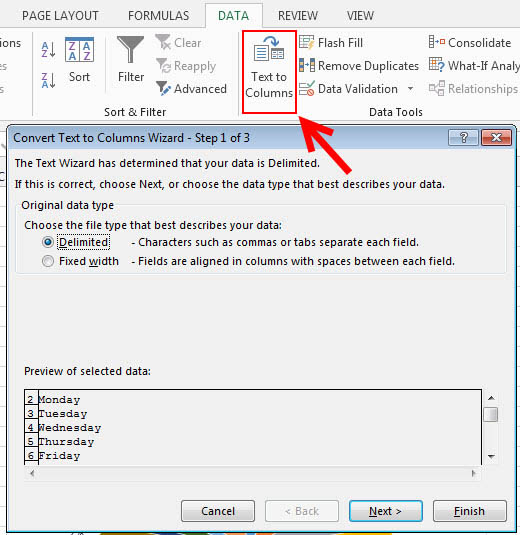
Convert Text to Columns
Sometimes you will want to split data in one cell into two or more cells. You can do this easily by utilizing the Convert Text to Columns Wizard.
- Highlight the column in which you wish to split the data
- Click the Text to Columns button on the Data tab
- Click Delimited if you have a comma or tab separating the data, or click fixed widths to set the data separation at a specific size.
Modify Fonts
Modifying fonts in Excel will allow you to emphasize titles and headings. To modify a font:
- Select the cell or cells that you would like the font applied
- On the Font group on the Home tab, choose the font type, size, bold, italics, underline, or color
Format Cells Dialog Box
In Excel, you can also apply specific formatting to a cell. To apply formatting to a cell or group of cells:
- Select the cell or cells that will have the formatting
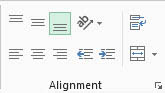
- Click the Dialog Box arrow on the Alignment group of the Home tab
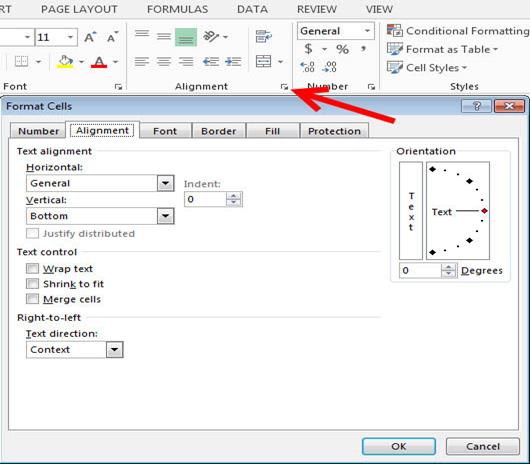
There are several tabs on this dialog box that allow you to modify properties of the cell or cells.
- Number: Allows for the display of different number types and decimal places
- Alignment: Allows for the horizontal and vertical alignment of text, wrap text, shrink text, merge
- cells and the direction of the text.
- Font: Allows for control of font, font style, size, color, and additional features
- Border: Border styles and colors
- Fill: Cell fill colors and styles
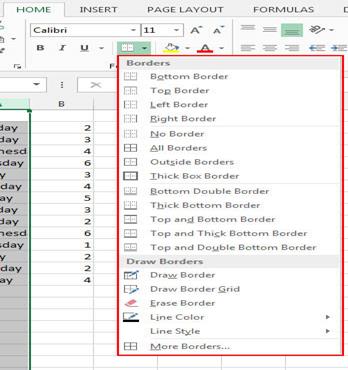
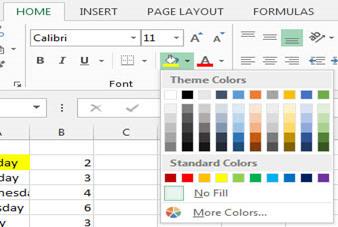
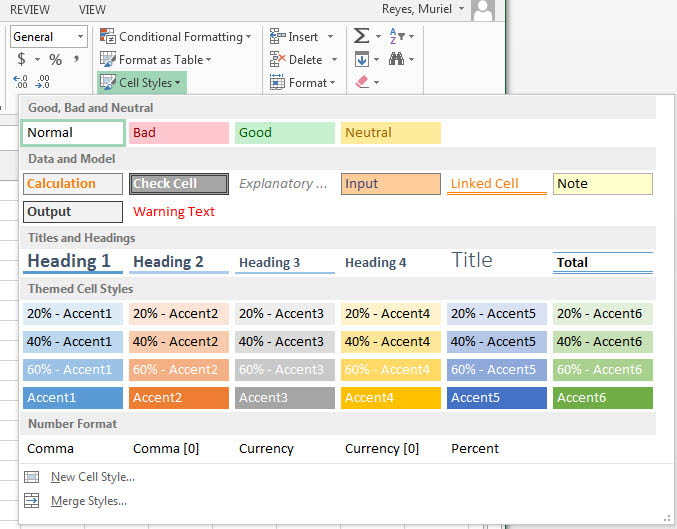
Add Borders and Colors to Cells
Borders and colors can be added to cells manually or through the use of styles. To add borders manually:
- Click the Borders drop down menu on the Font group of the Home tab
- Choose the appropriate border
To apply colors manually:
- Click the Fill drop down menu on the Font group of the Home tab
- Choose the appropriate color
To apply borders and colors using styles:
- Click Cell Styles on the Home tab
- Choose a style or click New Cell Style
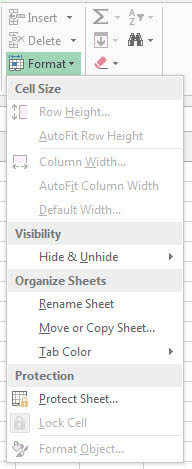
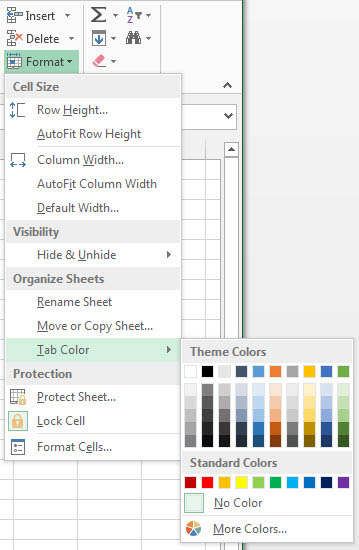
Change Column Width and Row Height
- To change the width of a column or the height of a row:
- Click the Format button on the Cells group of the Home tab
- Manually adjust the height and width by clicking Row Height or Column Width
- To use AutoFit click AutoFit Row Height or AutoFit Column Width
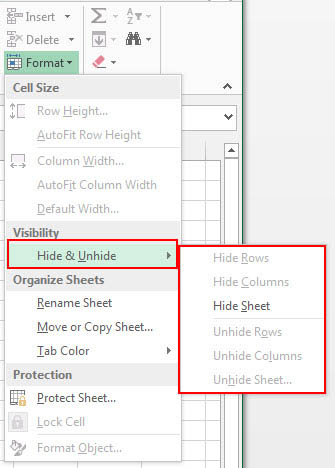
Hide or Unhide Rows or Columns
To hide or unhide rows or columns:
- Select the row or column you wish to hide or unhide
- Click the Format button on the Cells group of the Home tab
- Click Hide & Unhide
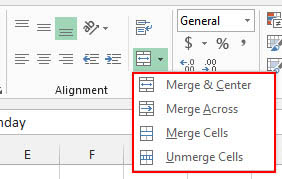
Merge Cells
To merge cells select the cells you want to merge and click the Merge & Center button on the Alignment group of the Home tab. The four choices for merging cells are:
- Merge & Center: Combines the cells and centers the contents in the new, larger cell
- Merge Across: Combines the cells across columns without centering data
- Merge Cells: Combines the cells in a range without centering
- Unmerge Cells: Splits the cell that has been merged
Align Cell Contents
To align cell contents, click the cell or cells you want to align and click on the options within the Alignment group on the Home tab. There are several options for alignment of cell contents:
- Top Align: Aligns text to the top of the cell
- Middle Align: Aligns text between the top and bottom of the cell
- Bottom Align: Aligns text to the bottom of the cell
- Align Text Left: Aligns text to the left of the cell
- Center: Centers the text from left to right in the cell
- Align Text Right: Aligns text to the right of the cell
- Decrease Indent: Decreases the indent between the left border and the text
- Increase Indent: Increase the indent between the left border and the text
- Orientation: Rotate the text diagonally or vertically
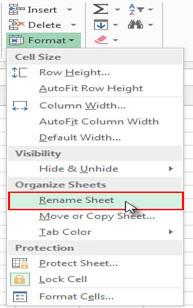
Format Worksheet Tab
You can rename a worksheet or change the color of the tabs to meet your needs.
To rename a worksheet:
- Open the sheet to be renamed
- Click the Format button on the Home tab
- Click Rename sheet
- Type in a new name
- Press Enter
To change the color of a worksheet tab:
- Open the sheet to be renamed
- Click the Format button on the Home tab
- Click Tab Color
- Click the color
Reposition Worksheets
To move worksheets in a workbook:
- Open the workbook that contains the sheets you want to rearrange
- Click and hold the worksheet tab that will be moved until an arrow appears in the left corner of the sheet
- Drag the worksheet to the desired location

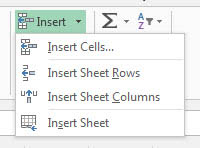
Insert and Delete Worksheets
To insert a worksheet:
- Open the workbook
- Click the Insert button on the Cells group of the Home tab
- Click Insert Sheet
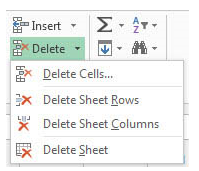
To delete a worksheet:
- Open the workbook
- Click the Delete button on the Cells group of the Home tab
- Click Delete Sheet
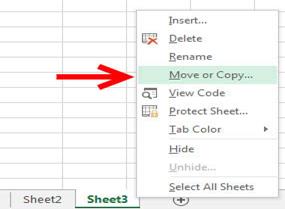
Copy and Paste Worksheets
To copy and paste a worksheet:
- Click the tab of the worksheet to be copied
- Right click and choose Move or Copy
- Choose the desired position of the sheet
- Click the check box next to Create a Copy
- Click OK
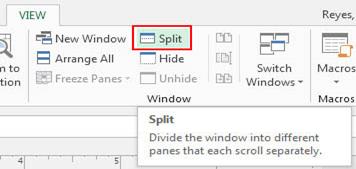
Split a Worksheet
You can split a worksheet into multiple resizable panes for easier viewing of parts of a worksheet. To split a worksheet:
- Select any cell in center of the worksheet you want to split
- Click the Split button on the View tab
- Notice the split in the screen, you can manipulate each part separately
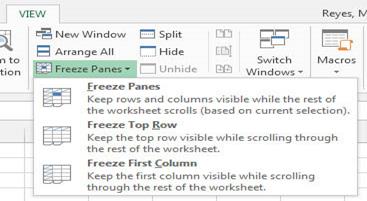
Freeze Rows and Columns
You can select a particular portion of a worksheet to stay static while you work on other parts of the sheet. This is accomplished through the Freeze Rows and Columns Function. To Freeze a row or column:
- Click the Freeze Panes button on the View tab
- Either select a section to be frozen or click the defaults of top row or left column
- To unfreeze, click the Freeze Panes button
- Click Unfreeze
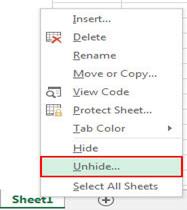
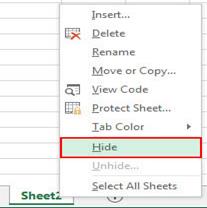
Hide Worksheets
To hide a worksheet:
- Select the tab of the sheet you wish to hide
- Right-click on the tab
- Click Hide
To unhide a worksheet:
- Right-click on any worksheet tab
- Click Unhide
- Choose the worksheet to unhide