Spell and Grammar Check
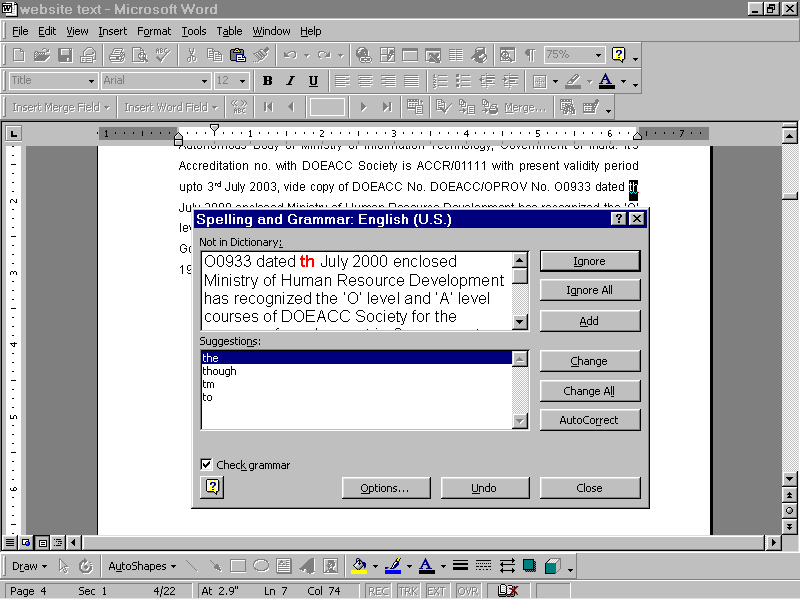
It is quite obvious we may make some spelling mistakes while typing in the document. To start spell check of a document click TOOLS option on the menu bar then select the Spelling and Grammar option of the menu, this will start the spell check facility, or to activate the spell check click on the button with a symbol and ABC written on it.
Automatically Spelling Check
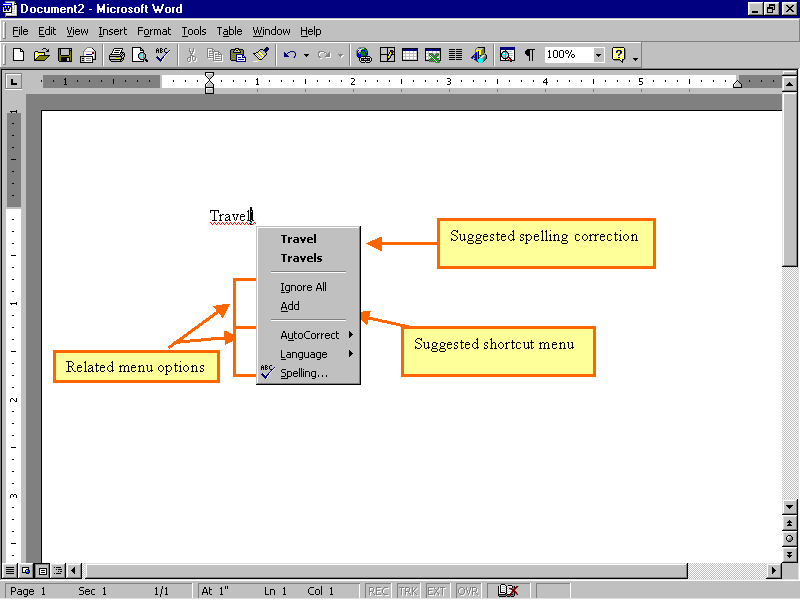
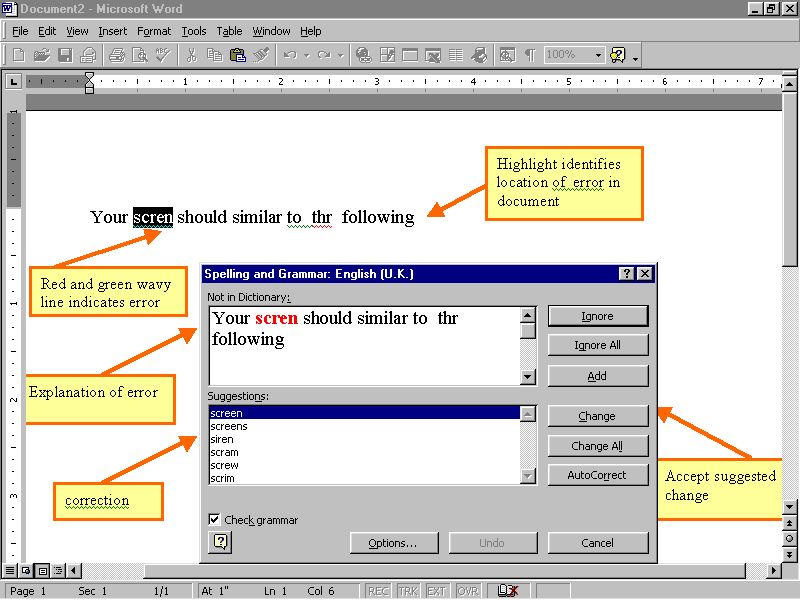
The automatic spelling checking feature advises we of misspelled words as we create and edit a document and proposes possible corrections. The Spelling Checker compares each word we type to a main dictionary of words supplied with the program. Although this dictionary includes most common words, it may not include proper names, technical terms and so on. If the word does not appear in the dictionary, the program identifies it as misspelled word by editing it. Alternatively, we can display a list of suggested spelling corrections for that word and select the correct spelling from the list to replace the misspelled word by editing it. The quickest way to correct a misspelled word is to select the correct spelling from a list of suggested spelling corrections displayed on the Spelling shortcut menu.
Set spelling options and grammar options for another language
To set spelling options and grammar options for the language that you want to work in, follow these steps
- On the Tools menu, click Options, and then click the Spelling & Grammar tab.
- Select the spelling options and the grammar options that you want, and then click OK.
Automatically Grammar Check
Also we may have noted that there is green wavy line under certain words, this means Word has located a grammatical error. The automatic grammar-checking feature advises us of incorrect grammar as we create and edit a document, and proposes possible corrections. If Word detects grammatical errors in subject-verb agreements, verb forms, capitalization or commonly confused words, they are identified with a wavy green line.
Thesaurus
The thesaurus is a reference tool that provides synonyms, antonyms and related words for a selected word or phrase. Synonyms are words with a similar meaning, such as “cheerful” and “happy” Antonyms are words with an opposite meaning, such as “cheerful” and “sad”. Related words are words that are variations of the same word, such as “Cheerful” and “cheer”. The thesaurus can help to liven up our documents by adding interest and variety to our text.
The thesaurus dialog box displays a list of possible meanings for the word. The currently selected meaning “content”, is appropriate for this sentence. The words in the Replace with Synonym box are synonymous for the word “happy” with a meaning of “content”.
Steps to look up words in the thesaurus
- On the Tools menu, click Research.
- In the Search for list, select Thesaurus.
- Press ALT and click the word you want to look up. Results appear in the Research task pane.
- To use one of the words in the list of results or to search for more words, point to it, click the down arrow, and then click Insert or Copy.
Word Count
It is used to count words and lines in a document. It is done by selecting Word Count on the Tools menu.
We can also view the number of words and lines in a document by clicking Properties on the File menu, and then clicking the Statistics tab. The word count window is shown in the figure below
AutoCorrect
The AutoCorrect feature makes some basic assumptions about the text we are typing and based on these assumptions automatically identifies and/or corrects the entry. The AutoCorrect feature automatically inserts proper capitalization at the beginning of sentences and in names of days of the week. I addition it also corrects many common spelling errors automatically.
AutoText and AutoComplete
The auto text feature includes entries, such as commonly used phrases. That can be quickly inserted into a document. The Auto text entries can be selected and inserted into the document using the Insert/Auto text command. Words standard auto text entries include salutations and closing phrases, and we can add our entries to the auto text list.
While looking at the letter, we realize that the closing lines have not been added to the document. We can quickly add standard phrases such as a closing to a document using the AutoText feature.
If the AutoComplete feature is on, a screen tip appears as we type the first four characters of an Auto text entry that suggests the remainder of the auto text entry we may want to use. We can choose to accept the suggestion to insert it into the document or continue typing it to ignore it.
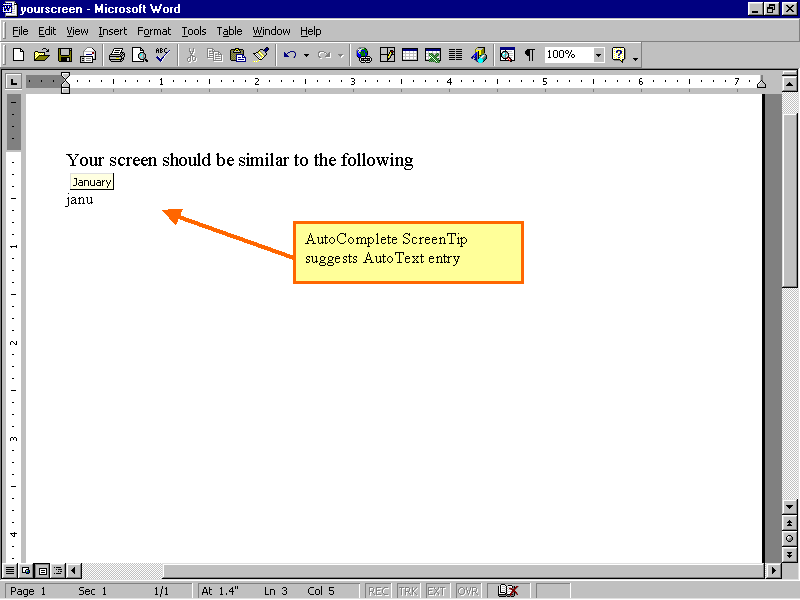
The AutoComplete ScreenTip suggests that we may be typing the word “January”. When the suggestion appears we can press “Enter” or “F3” to accept it, and Auto text suggestion is entered automatically, for we.
Hyphenating document
We can use the hyphenation feature to give our documents a polished and professional look. For example, hyphenation helps eliminate gaps or “rivers of white” in justified text. Hyphenation also helps maintain even line lengths in narrow columns. When we turn on automatic hyphenation, Word automatically inserts hyphens where they are needed in the document. If we later edit the document and change line breaks, then Word re-hyphenates the document. For it –
- On the Tools menu, point to Language, and then click Hyphenation.
- Select the Automatically hyphenate document check box.
- In the Hyphenation zone box, enter the amount of space to leave between the end of the last word in a line and the right margin. To reduce the number of hyphens, make the hyphenation zone wider. To reduce the raggedness of the right margin, make the hyphenation zone narrower.
- In the Limit consecutive hyphens to box, enter the number of consecutive lines that can be hyphenated.
Macros
MS-Word has a feature called macros, where Macros is a series of computer instructions recorded and saved with a specific name. Word carries out the instructions in the macro, when macros are activated. Macros help automate repetitive and complex tasks. The macros execute a set of commands at a stretch that save time and effort in comparison to entering commands manually in a repetitive manner. You can create a macro in order to format paragraphs or to gather information from other documents, formats the information in a table, and tabulates the data in various columns. In a nutshell, a single macro can perform the actions of a cluster of commands in the order the commands are set.
Creating and Recording Macros
The steps involved in creating a macro is to turn on the macro recorder and choose the commands and enter the keystrokes that you have to do repeatedly.
Following are the steps undertaken while creating and recording Macros
- Select the Tools menu from the standard Toolbar
- Choose the Macro option
- Click on Record New Macro from the drop-down list. A dialog box will appear as under.
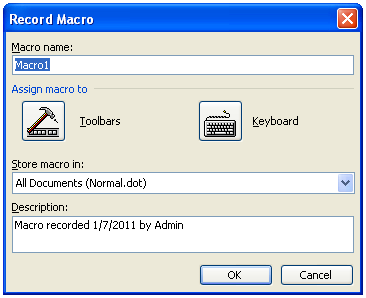
- Enter a name for the Macro accordingly in the Macro Name text box. But, a macro name cannot start with a number or include blank spaces.
- The Description box describes the macro being recorded.
- Store Macro: This option enables a drop-down list; which make sure that the name of the template stored the macro is listed.
- A keyboard shortcut or any button on the toolbar can be assigned for the macros. For this you need to click either on Toolbars or Keyboard button. Shortcuts are assigned in the same manner.
Default Macros Icon
Consider the following steps to generate default Macros Icons
- Click on Toolbars, another dialog box appears. It offers macros along with the default Icon from the macro.
- Place this Icon on the desired toolbar.
- To change its appearance right click on it, from the Context Sensitive popup, select Text only to get only the icon within macro name.
- Again right click on it and select Change button Image from the popup.
- A list of icons will appear, select any one of them to replace your existing one.
- Click Ok. The Stop Recording toolbar and a mini-cassette tape will appear below the pointer.
- Enter the commands accordingly and perform the requisite activities using macros.
- Click the Pause button if you need to stop recording for a moment.
- Click the Stop Recording button on the toolbar or double-click REC on the Status bar to record a macro if required.
Invoking a Macro
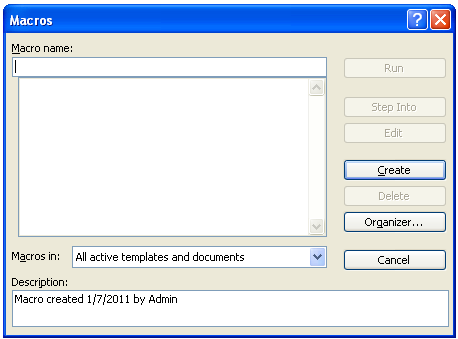
Macros are invoked to get repetitive effects of commands that are stored in the macro. For the purpose of invoking a macro choose Macro from Tools bar menu and select the option Macros from the drop-down list. Immediately Macros dialog box will appear on your screen select the required macro name from the list and click Run.
Removing Macro
To remove a macro, select the macro from the Macros dialog box and click Delete option.
Protecting Documents
In order to protect a document containing confidential information, hold a password to maintain privacy. The document containing a password when made available on LAN (Local Area Network) ensures secrecy and is protected against any theft. The document is protected from being opened or modified by others. The steps involved in assigning password to a document are as follows
- Select File menu from the standard toolbar
- Click on Save As, to save the document
- From the Tools drop-down list, click on options and choose Security from the list. A dialog box (as below) will be displayed on your screen asking for a password.
A Password will be ascertained to open the document thereby ensuring the confidentiality of the document. In order to protect a document from being modified, go for “Password to Modify” option, a Password for Modifying the text will be assigned, once you click Ok.
Dialog Box for Password Security under Options in the Tools Menu will be displayed on your screen as under
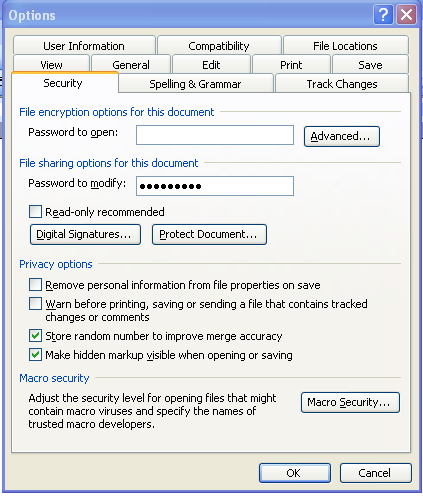
Security Tab
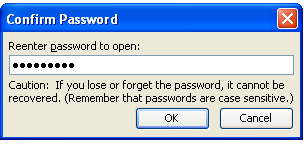
Confirm password dialog box
Confirm Password dialog box asks the user to insert the same password again and click Ok for confirmation. At last click Save from the File menu to save the document along with modification password. The file will open as a read-only document if the user doesn’t know the password to modify but only knows the Password to Open or if no a Password is specified to Open. The same steps are followed to protect a document from being opened, by setting a password in the “Password to Open” text box. A password can contain up to 15 characters which can include spaces and is case sensitive. Read-Only Recommended check box asks the user whether or not to open the document as a read-only document. Do not specify a password when you recommend that a document be opened as read-only but you can’t prevent users from ignoring the recommendation.
Remove Password
Following steps are undertaken to remove password from a document
- Choose the Save As option or Tools menu from the standard toolbar
- Click on Options from the drop-down list and select Security
- Select the Ok button
- Save control tab
- Remove all asterisk symbols from the corresponding password text box.
- Save the document to implement the changes.
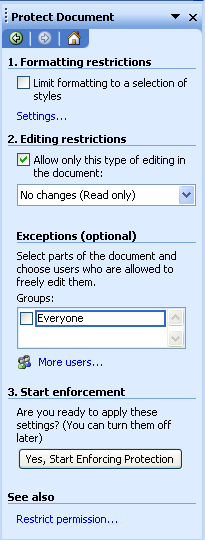
Formatting Protection
In order to protect your document Word enables the user with the Protect Document feature implemented by selecting Tools menu and choosing Protect Document from the drop-down list. These options are dividing into two categories
- Limit formatting to selection of styles: If you restrict the formatting like (Bold, Italic, Underline, Bullets etc) then click on Yes, Start enforcing protection.
- Allow only this type of editing in the document: This option is used to implement editing restrictions in the document.