Merging means to combine or merge existing data to form new data as per user’s requirements. The Mail Merge feature in MS-Word allows the user to generate bulk of personalized correspondence quickly and conveniently by merging information from two different files. For instance you can merge a list of names and addresses from one file with a form letter in another file to create a number of personalized form letters. The Mail Merge feature allows you to send merged documents directly to the printer or save them to a file for editing and later printing, once the main document and the data source document are prepared.
Date Source: This document contains information that varies in each version, such as the names and addresses of each recipient of a form letter.
Main Document: This document contains text and other items which you want to be identical with each version of the merged document.
Merge fields: These are special instructions that are included into the main document to instruct MS-Word to print the variable information from the Data Source. MS-Word replaces merge fields in the Main Document with the appropriate information from the Data Source after the merging of Data Source and the Main Document is complete.
Procedure for Mail Merge
The user must ensure to type the text to be included in every form letter and leaving blank space for the text to be inserted from the Data Source.
Following steps are undertaken to implement the Mail Merge feature in the document-
- Select the Tools menu from the Standard Toolbar
- Choose the Letters and Mailing option from the list
- Mail Merge task pane will appear on your screen as shown in the following figure.
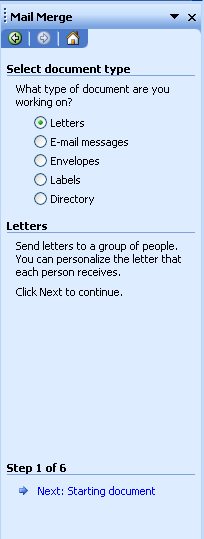
- Click on Letter option and then choose Next Starting document at the foot of the task pane. A new dialog box will pop-up as below
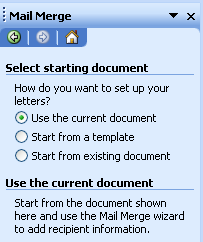
- Select Next Select recipients at the foot of the Task pane. Dialog box as under will appear,
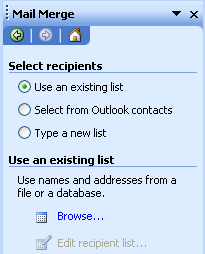
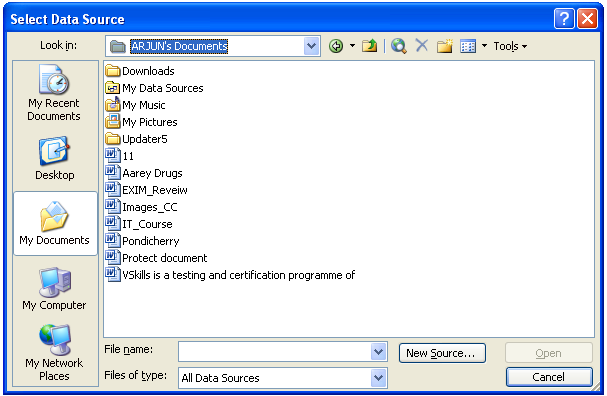
- You can either use an existing list by browsing a document from the selected data source. Following dialog box will appear on your screen.
- You may also select to Type a new list and click on Create option in the task pane. New Address List dialog box will appear on your screen, as under.
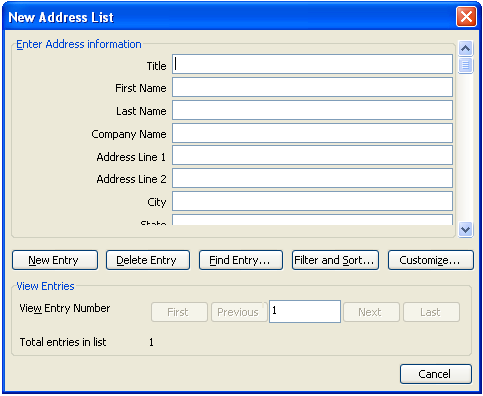
Customize: This option is used to edit a particular field such as Add, Edit, Delete, Rename, and up/down.
New entry: This option is used to store more records
Filter and Sort: This option is used to find a particular record and also give the conditions to a particular field. Filter and Sort option is very useful for mail merge as it facilitates the user to sort (Ascending, descending) the database on a particular field.
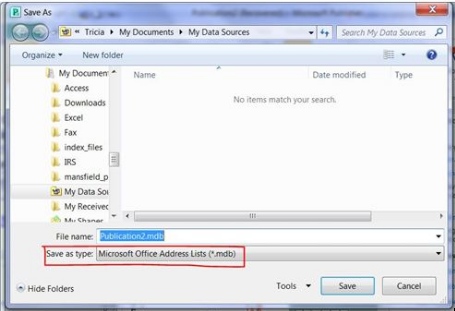
- Once you click on the cancel button a now a dialog box will appear to save the file by default. This file will be stored into my data source folder, but it can also be saved to another folder.
- If your database already exists then select Use an Existing list option and Select a different list & Select the file name & Click on Open.
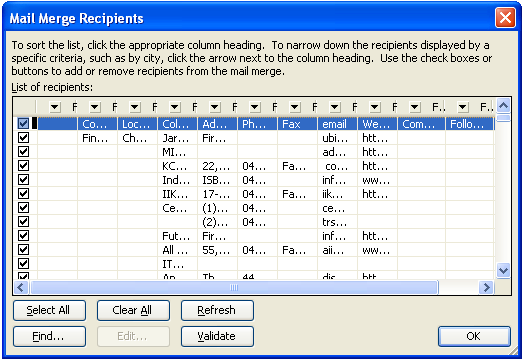
- The existing database can be edited from Edit recipients list, which will be enabled if the file has been selected form the database. To edit or add any new entry just select a recipient from the database and click on edit, a new window will appear from where you can add , delete, find a particular entry.
- Save the document by clicking on the Save As or Save option from the File menu.
- Consequently a new window will appear which displays the entire recipient name you can customize the any fields like add, remove, edit, find etc.
- Lastly click on Ok button.
- Mail Merge toolbar will emerge in the main document window.

- Click on Write to letters, Place the point of insertion where the Merge Fields are to be appeared.
- Click the Insert Merge Field button on the Mail Merge toolbar to insert merge fields into the main document. Spaces and punctuation marks can also be inserted between merge fields, just as you would in any address. Note that, the merge field can be inserted more than once in the main document.
- Click the Merge to New Document button on the Mail Merge toolbar and store letters in a new document.
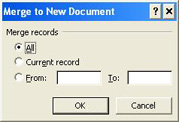
- In order to merge the record to all recipient Select All and click on Ok button, or Select Current record, for merge the record to a single recipient Or Select From To options, Like Not to all (Exam – 2 to 6 or 3 to 7).
- To print the resulting form letters click the Merge to Printer button on the Mail Merge toolbar.
Types of Mail Merge
Table Mail Merge with Word Table
An existing list can be used with the help of Word’s table feature; either by creating a fresh address or copying a table that has already been made in another document. Save this document with only table with a name to identify and recall later on. This file will be stored under My data source folder with extension .mdb. Locate and select the document that holds the addresses when you merge data source table with the main document. We can edit the existing list in the data source file created in Word directly as Word table. Step to create Table Mail Merge with Word Table
- Click on New in the File Menu from the standard toolbar to open a new document
- Select the Tools menu
- Choose the Letters and Mailing option
- Mail merged Use the current documents
- Select recipients
- Use an existing list
- Browse and Select the file from My data source folder
- Open and Click on insert merge field from mail merge toolbar.
- Follow similar steps as in normal mail merge
Conditional Mail Merge
Conditional Mail Merge is used for merging of specific Records of a Data Source. Word facilitates the user to merge only few selective records from the data source with the main document prior to merging the main document and the data source. Suppose you want to send form letters or print mailing labels for those recipients living in the same city and not to everyone. This process of picking out a few selective records from the data source is called Filter.
Procedure to filter the data source before you merge records with the main document is as follows-
- After selecting the fields, choose the Edit recipients list and then click on merge to new documents.
- Next click on drop down arrow and select Advanced option.
- On the Filter Records tab, choose a field, comparison operator and enter a value to describe the records in the data source that you want to merge with the main document.
Filter and Sort
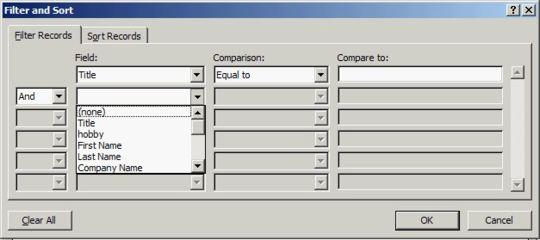
The following dialog box will appear on your screen such that you can insert as one or as many as six conditions. For inserting more than one condition, choose And / Or option from the drop-down list to describe how the next condition will work.
And option: This option contracts the number of records that are merged to those described by the condition entered in combination with the operators.
Or option: This option broadens the number of records that are merged to include records described by the conditions.
Sort Records: This option facilitates the user to sort the records (ascending and descending order)
In the end click OK to continue Mail Merge
Mail Merge via Ms Query
MS word provides a very useful feature called MS query that enables the user to create a simple query by using the Query Wizard, or you can create a more complex query by using the advanced features of Microsoft Query. For example, you can retrieve Microsoft Excel data about a specific product by region.
Note this advance Mail Merge can be performed after completion of Excel. Procedure of Mail Merge via Ms Query
- Select the Tools menu from the standard toolbar
- Choose Letters and mailing
- Click on Mail merge
- Select Letters options
- Next starting document
- Select use the current documents
- Next starting recipients
- Select use an existing list
- Browse and Click on New source.
- Select ODBC DSN and click Next
- Connect to ODBC Data Source
- Select appropriate ODBC and then Click on Next
- Select the Database and Table
- Select the specific table
- Click on Next.
- Select Data Connection File
- Give the filename if you want to change the default the name and click on Finish.
- Next select the file and click on open.
- Select the Recipients from the Dialog Box
- From the windows click on Clear all option then select only that data which is needed.
- Now click on Insert merge field from mail merge toolbar and select the required field
- Lastly click on Close.
Note: The remaining options are similar to normal mail merge.
Envelopes
Creating Envelopes
Following steps are undertaken to create envelopes
- Select the Tools option
- Choose Letters and mailing option from the drop-down list
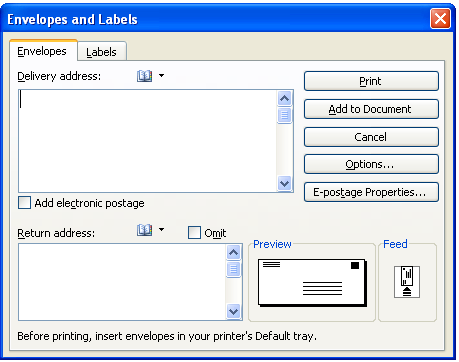
- Click on Envelopes and labels
- Place the Return address into the Return address box
- Click to add to document.
Following dialog box will appear on your screen as below for Envelopes and Labels.
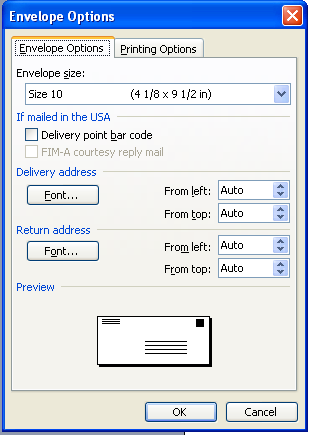
- Click on options a dialog box will appear for Envelope Options.
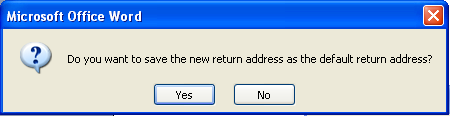
- Another dialog box will pop-up to Save, Click Yes button for saving the same.
- Select Tools and choose Labels and mailing.
- Click on Mail merge to display the mail merge task pane
- Choose Envelopes from select document type.
- Next to click Starting document, Choose a starting document option. If you began with a blank document choose change document layout or choose start from existing document to use existing envelopes setup.
- Select Choose document layout and click on label option to set up.
- Click on Envelope options and set up the envelop you want to use, select the envelop size and font options, after click on Ok, place the envelope in the document window.
Select recipient list
- Attach the data source from Existing list or Outlook folder or Create a new list.
- Use an Existing list, by selecting the file from browse options. In case you have saved the database into Microsoft excel, Select the file and Click on open, to open the document
The following dialog box will appear on your screen.
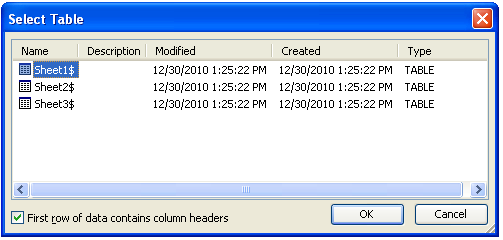
- Select the Sheet and click on Ok the following dialog box will appear, as under
Modifying the recipient
In order to modify the recipient list following steps are undertaken
- Click edit recipient list.
- Perform sorting or filtering, or selecting individual records as required.
- Click next to Arrange your envelope to proceed.
- Position the point of insertion point on the envelope and insert the fields you want to use.
- Insert a Postal bar code before the name fields by clicking on the postal bar code. This is done to speed up the delivery process.
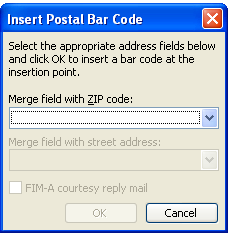
Dialog box for inserting Postal Bar Code
- Click to Preview your envelopes
- Click Complete the merge when you are ready to proceed
- Next click to edit individual envelopes and select All form merge to document screen.
- The address can be printed into envelopes by clicking on print and select All or Current record or From To Options as per your requirements.
- Lastly click Ok.
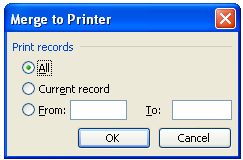
Dialog Box for Merge to Printer
Labels
Creating Labels
Steps undertaken to create labels are as follows-
- Select Tools Labels and mailing
- Choose the Mail merge option to exhibit the mail merge task pane
- Click on Label from select document type
- Next to click Starting document. Choose a starting document option. If you began with a blank document choose change document layout and choose start from existing document to use existing label.
- Select Choose document layout and click on label option to set up.
- Select the product number that appears on your label package.
Editing labels
In case the type of label you want to use is not listed in the Product number box, you can use one of the listed labels, or create your own custom labels by clicking on the New Label, after that for customize click on details. The Labels options dialog box will appear on your screen.
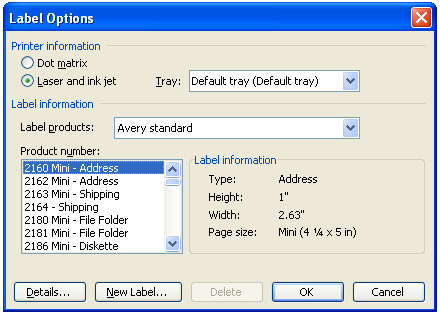
For creating a new Label select choose New Label to invoke the New Custom Laser
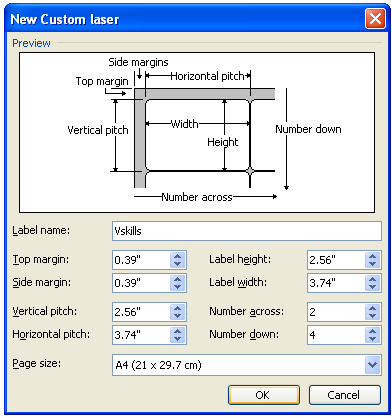
The New Custom Laser window is used to modify the Margin, Label height, width. In case you wish to print label only one then decrease the Number to down 1 and same as Number across.
Steps for editing labels
- Click Next select recipient.
- Choose use an Existing list by selecting the file from browse options
- Next click to Arrange your labels or set up the labels with the fields you want to use
- Insert and format the fields on the first labels
- Click to Update all labels –
- Preview your labels to get a picture of the final merged document.
- Click Next on Complete the merge.
- At last for Merge to new documents click on Edit Individual labels and select All (Merge record) options Ok.
- Print of labels directly by clicking on Print from merge options.
