At this point, anyone looking to add custom behavior to Django’s admin interface is probably starting to get a bit frustrated. “All you’ve talked about is how to change the admin interface visually,” we hear them cry. “But how do I change the way the admin interface works?” The first thing to understand is that it’s not magic. That is, nothing the admin interface does is “special” in any way — the admin interface is just a set of views (they live in django.contrib.admin.views) that manipulate data just like any other view.
Sure, there’s quite a bit of code in there; it has to deal with all the various options, field types, and settings that influence model behavior. Still, when you realize that the admin interface is just a set of views, adding custom admin views becomes easier to understand. By way of example, let’s add a “publisher report” view to our book application from Chapter 6. We’ll build an admin view that shows the list of books broken down by publisher — a pretty typical example of a custom admin “report” view you might need to build. First, let’s wire up a view in our URLconf. We need to insert this line:
(r’^admin/books/report/$’, ‘mysite.books.admin_views.report’),
before the line including the admin views. A bare-bones URLconf might look like this:
from django.conf.urls.defaults import *
urlpatterns = patterns(”,
(r’^admin/bookstore/report/$’, ‘bookstore.admin_views.report’),
(r’^admin/’, include(‘django.contrib.admin.urls’)),
)
Why put the custom view before the admin inclusion? Recall that Django processes URL patterns in order. The admin inclusion matches nearly anything that falls under the inclusion point, so if we reverse the order of those lines, Django will find a built-in admin view for that pattern, which won’t work. In this particular case, it will try to load a change list for a Report model in the books application, which doesn’t exist. Now let’s write our view. For the sake of simplicity, we’ll just load all books into the context and let the template handle the grouping with the {% regroup %} tag. Create a file, books/admin_views.py, with this code:
from mysite.books.models import Book
from django.template import RequestContext
from django.shortcuts import render_to_response
from django.contrib.admin.views.decorators import staff_member_required
def report(request):
return render_to_response(
“admin/books/report.html”,
{‘book_list’ : Book.objects.all()},
RequestContext(request, {}),
)
report = staff_member_required(report)
Because we left the grouping up to the template, this view is pretty simple. However, there are some subtle bits here worth making explicit:
- We use the staff_member_required decorator from contrib.admin.views.decorators. This is similar to the login_required decorator discussed in Chapter 12, but this decorator also checks that the given user is marked as a “staff” member, and thus is allowed access to the admin interface.
- This decorator protects all the built-in admin views and makes the authentication logic for your view match the rest of the admin interface.
- We render a template located under admin/. While this isn’t strictly required, it’s considered good practice to keep all your admin templates grouped in an admin We’ve also put the template in a directory named books after our application — also a best practice.
- We use RequestContext as the third parameter (context_instance) to render_to_response. This ensures that information about the current user is available to the template.
Finally, we’ll make a template for this view. We’ll extend the built-in admin templates to make this view visually appear to be part of the admin interface:
{% extends “admin/base_site.html” %}
{% block title %}List of books by publisher{% endblock %}
{% block content %}
<div id=”content-main”>
<h1>List of books by publisher:</h1>
{% regroup book_list|dictsort:”publisher.name” by publisher as books_by_publisher %}
{% for publisher in books_by_publisher %}
<h3>{{ publisher.grouper }}</h3>
<ul>
{% for book in publisher.list|dictsort:”title” %}
<li>{{ book }}</li>
{% endfor %}
</ul>
{% endfor %}
</div>
{% endblock %}
By extending admin/base_site.html, we get the look and feel of the Django admin “for free.” Figure 17-2 shows what the end result looks like.
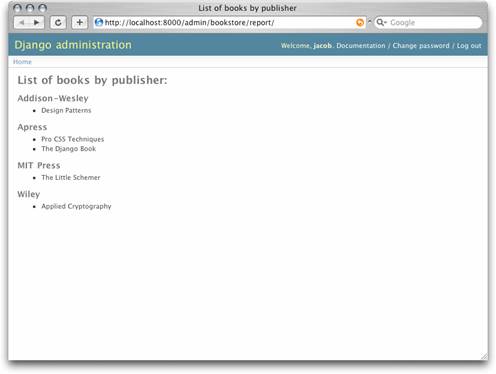
Figure 17-2. A custom “books by publisher” admin view
You can use this technique to add anything you can dream of to the admin interface. Remember that these so-called custom admin views are really just normal Django views; you can use all the techniques you learn in the rest of this book to provide as complex an admin interface as you need. We’ll close out this chapter with some ideas for custom admin views.
