Reactive forms involve explicit management of the data flowing between a non-user interface (UI) data model and a UI-oriented form model that retains the states and values of the HTML controls on screen.
Reactive forms offer the ease of using reactive patterns, testing, and validation. Reactive Forms involve the creation of a tree of Angular form control objects in the component class app.component.ts , which are also bound to native form control elements in the component template app.component.html.
The component class has access to the data model and the form control structure, which enables you to propagate data model values into the form controls and retrieve user-supplied values in the HTML controls. The component can observe changes in form control state and react to those changes. One advantage of working with form control objects directly is that value and validity updates are always synchronous and under your control. You won’t encounter the timing issues that sometimes plague a template-driven form and reactive forms can be easier to unit test. Since reactive forms are created directly via code, they are always available, which enables you to immediately update values and “drill down” to descendant elements.
Features of reactive forms, are
- Easier Unit testing
- More flexible,So Handles any complex scenarios.
- Reactive transformations can be made possible such as Adding elements dynamically
- No data binding is done(Immutable data model preferred by most developers)
- More component code and less HTML markup
Reactive Forms Basics
Angular reactive forms facilitate a reactive style of programming that favors explicit management of the data flowing between a non-UI data model (typically retrieved from a server) and a UI-oriented form model that retains the states and values of the HTML controls on screen. Reactive forms offer the ease of using reactive patterns, testing, and validation.
With reactive forms, you create a tree of Angular form control objects in the component class and bind them to native form control elements in the component template, using techniques described in this guide.
You create and manipulate form control objects directly in the component class. As the component class has immediate access to both the data model and the form control structure, you can push data model values into the form controls and pull user-changed values back out. The component can observe changes in form control state and react to those changes.
One advantage of working with form control objects directly is that value and validity updates are always synchronous and under your control. You won’t encounter the timing issues that sometimes plague a template-driven form and reactive forms can be easier to unit test.
In keeping with the reactive paradigm, the component preserves the immutability of the data model, treating it as a pure source of original values. Rather than update the data model directly, the component extracts user changes and forwards them to an external component or service, which does something with them (such as saving them) and returns a new data model to the component that reflects the updated model state.
Using reactive form directives does not require you to follow all reactive priniciples, but it does facilitate the reactive programming approach should you choose to use it.
Async vs. sync
Reactive forms are synchronous. Template-driven forms are asynchronous. It’s a difference that matters.
In reactive forms, you create the entire form control tree in code. You can immediately update a value or drill down through the descendents of the parent form because all controls are always available.
Template-driven forms delegate creation of their form controls to directives. To avoid “changed after checked” errors, these directives take more than one cycle to build the entire control tree. That means you must wait a tick before manipulating any of the controls from within the component class.
For example, if you inject the form control with a @ViewChild(NgForm) query and examine it in the ngAfterViewInit lifecycle hook, you’ll discover that it has no children. You must wait a tick, using setTimeout, before you can extract a value from a control, test its validity, or set it to a new value.
The asynchrony of template-driven forms also complicates unit testing. You must wrap your test block in async() or fakeAsync() to avoid looking for values in the form that aren’t there yet. With reactive forms, everything is available when you expect it to be.
Which is better, reactive or template-driven?
Neither is “better”. They’re two different architectural paradigms, with their own strengths and weaknesses. Choose the approach that works best for you. You may decide to use both in the same application.
The balance of this reactive forms guide explores the reactive paradigm and concentrates exclusively on reactive forms techniques.
Create a data model
The focus of this guide is a reactive forms component that edits a hero. You’ll need a hero class and some hero data. Create a new data-model.ts file in the app directory and copy the content below into it.
src/app/data-model.ts
export class Hero {
id = 0;
name = ”;
addresses: Address[];
}
export class Address {
street = ”;
city = ”;
state = ”;
zip = ”;
}
export const heroes: Hero[] = [
{
id: 1,
name: ‘Whirlwind’,
addresses: [
{street: ‘123 Main’, city: ‘Anywhere’, state: ‘CA’, zip: ‘94801’},
{street: ‘456 Maple’, city: ‘Somewhere’, state: ‘VA’, zip: ‘23226’},
]
},
{
id: 2,
name: ‘Bombastic’,
addresses: [
{street: ‘789 Elm’, city: ‘Smallville’, state: ‘OH’, zip: ‘04501’},
]
},
{
id: 3,
name: ‘Magneta’,
addresses: [ ]
},
];
export const states = [‘CA’, ‘MD’, ‘OH’, ‘VA’];
The file exports two classes and two constants. The Address and Hero classes define the application data model. The heroes and states constants supply the test data.
Create a reactive forms component
Make a new file called hero-detail.component.ts in the app directory and import these symbols:
src/app/hero-detail.component.ts
import { Component } from ‘@angular/core’;
import { FormControl } from ‘@angular/forms’;
Now enter the @Component decorator that specifies the HeroDetailComponent metadata:
src/app/hero-detail.component.ts (excerpt)
@Component({
selector: ‘hero-detail’,
templateUrl: ‘./hero-detail.component.html’
})
Next, create an exported HeroDetailComponent class with a FormControl. FormControl is a directive that allows you to create and manage a FormControl instance directly.
src/app/hero-detail.component.ts (excerpt)
export class HeroDetailComponent1 {
name = new FormControl();
}
Here you are creating a FormControl called name. It will be bound in the template to an HTML input box for the hero name.
A FormControl constructor accepts three, optional arguments: the initial data value, an array of validators, and an array of async validators.
This simple control doesn’t have data or validators. In real apps, most form controls have both.
Create the template
Now create the component’s template, src/app/hero-detail.component.html, with the following markup.
src/app/hero-detail.component.html
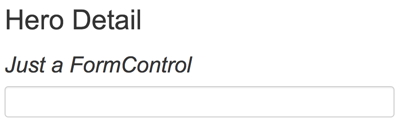
<h2>Hero Detail</h2>
<h3><i>Just a FormControl</i></h3>
<label class=”center-block”>Name:
<input class=”form-control” [formControl]=”name”>
</label>
To let Angular know that this is the input that you want to associate to the name FormControl in the class, you need [formControl]=”name” in the template on the <input>. Disregard the form-control CSS class. It belongs to the Bootstrap CSS library, not Angular. It styles the form but in no way impacts the logic of the form.
Import the ReactiveFormsModule
The HeroDetailComponent template uses formControlName directive from the ReactiveFormsModule. In this sample, you declare the HeroDetailComponent in the AppModule. Therefore, do the following three things in app.module.ts:
- Use a JavaScript import statement to access the ReactiveFormsModule and the HeroDetailComponent.
- Add ReactiveFormsModule to the AppModule’s imports list.
- Add HeroDetailComponent to the declarations array.
src/app/app.module.ts (excerpt)
import { NgModule } from ‘@angular/core’;
import { BrowserModule } from ‘@angular/platform-browser’;
import { ReactiveFormsModule } from ‘@angular/forms’; // <– #1 import module
import { AppComponent } from ‘./app.component’;
import { HeroDetailComponent } from ‘./hero-detail.component’; // <– #1 import component
@NgModule({
imports: [
BrowserModule,
ReactiveFormsModule // <– #2 add to @NgModule imports
],
declarations: [
AppComponent,
HeroDetailComponent, // <– #3 declare app component
],
bootstrap: [ AppComponent ]
})
export class AppModule { }
Display the HeroDetailComponent
Revise the AppComponent template so it displays the HeroDetailComponent.
src/app/app.component.ts
import { Component } from ‘@angular/core’;
@Component({
selector: ‘my-app’,
template: `
<div class=”container”>
<h1>Reactive Forms</h1>
<hero-detail></hero-detail>
</div>`
})
export class AppComponent { }
Essential form classes
It may be helpful to read a brief description of the core form classes.
- AbstractControl is the abstract base class for the three concrete form control classes: FormControl, FormGroup, and FormArray. It provides their common behaviors and properties, some of which are observable.
- FormControl tracks the value and validity status of an individual form control. It corresponds to an HTML form control such as an input box or selector.
- FormGroup tracks the value and validity state of a group of AbstractControl instances. The group’s properties include its child controls. The top-level form in your component is a FormGroup.
- FormArray tracks the value and validity state of a numerically indexed array of AbstractControl instances.
Style the app
You used bootstrap CSS classes in the template HTML of both the AppComponent and the HeroDetailComponent. Add the bootstrap CSS stylesheet to the head of index.html:
index.html
<link rel=”stylesheet” href=”https://unpkg.com/bootstrap@3.3.7/dist/css/bootstrap.min.css”>
Now that everything is wired up, the browser should display something like this:
 Add a FormGroup
Usually, if you have multiple FormControls, you’ll want to register them within a parent FormGroup. This is simple to do. To add a FormGroup, add it to the imports section of hero-detail.component.ts:
src/app/hero-detail.component.ts
import { Component } from ‘@angular/core’;
import { FormControl, FormGroup } from ‘@angular/forms’;
In the class, wrap the FormControl in a FormGroup called heroForm as follows:
src/app/hero-detail.component.ts
export class HeroDetailComponent2 {
heroForm = new FormGroup ({
name: new FormControl()
});
}
Now that you’ve made changes in the class, they need to be reflected in the template. Update hero-detail.component.html by replacing it with the following.
src/app/hero-detail.component.html
<h2>Hero Detail</h2>
<h3><i>FormControl in a FormGroup</i></h3>
<form [formGroup]=”heroForm” novalidate>
<div class=”form-group”>
<label class=”center-block”>Name:
<input class=”form-control” formControlName=”name”>
</label>
</div>
</form>
Notice that now the single input is in a form element. The novalidate attribute in the <form> element prevents the browser from attempting native HTML validations.
formGroup is a reactive form directive that takes an existing FormGroup instance and associates it with an HTML element. In this case, it associates the FormGroup you saved as heroForm with the form element.
Because the class now has a FormGroup, you must update the template syntax for associating the input with the corresponding FormControl in the component class. Without a parent FormGroup, [formControl]=”name” worked earlier because that directive can stand alone, that is, it works without being in a FormGroup. With a parent FormGroup, the name input needs the syntax formControlName=name in order to be associated with the correct FormControl in the class. This syntax tells Angular to look for the parent FormGroup, in this case heroForm, and then inside that group to look for a FormControl called name.
Disregard the form-group CSS class. It belongs to the Bootstrap CSS library, not Angular. Like the form-control class, it styles the form but in no way impacts its logic. The form looks great. But does it work? When the user enters a name, where does the value go?
Taking a look at the form model
The value goes into the form model that backs the group’s FormControls. To see the form model, add the following line after the closing form tag in the hero-detail.component.html:
src/app/hero-detail.component.html
<p>Form value: {{ heroForm.value | json }}</p>
<p>Form status: {{ heroForm.status | json }}</p>
The heroForm.value returns the form model. Piping it through the JsonPipe renders the model as JSON in the browser:
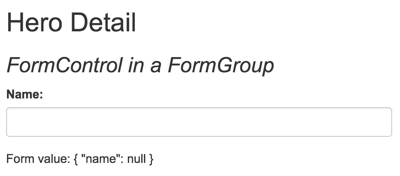
The initial name property value is the empty string. Type into the name input box and watch the keystokes appear in the JSON.
Great! You have the basics of a form.
In real life apps, forms get big fast. FormBuilder makes form development and maintenance easier.
Introduction to FormBuilder
The FormBuilder class helps reduce repetition and clutter by handling details of control creation for you. To use FormBuilder, you need to import it into hero-detail.component.ts:
src/app/hero-detail.component.ts (excerpt)
import { Component } from ‘@angular/core’;
import { FormBuilder, FormGroup } from ‘@angular/forms’;
Use it now to refactor the HeroDetailComponent into something that’s a little easier to read and write, by following this plan:
- Explicitly declare the type of the heroForm property to be FormGroup; you’ll initialize it later.
- Inject a FormBuilder into the constructor.
- Add a new method that uses the FormBuilder to define the heroForm; call it createForm.
- Call createForm in the constructor.
The revised HeroDetailComponent looks like this:
src/app/hero-detail.component.ts (excerpt)
export class HeroDetailComponent3 {
heroForm: FormGroup; // <— heroForm is of type FormGroup
constructor(private fb: FormBuilder) { // <— inject FormBuilder
this.createForm();
}
createForm() {
this.heroForm = this.fb.group({
name: ”, // <— the FormControl called “name”
});
}
}
FormBuilder.group is a factory method that creates a FormGroup. FormBuilder.group takes an object whose keys and values are FormControl names and their definitions. In this example, the name control is defined by its initial data value, an empty string.
Defining a group of controls in a single object makes for a compact, readable style. It beats writing an equivalent series of new FormControl(…) statements.
Validators.required – Though this guide doesn’t go deeply into validations, here is one example that demonstrates the simplicity of using Validators.required in reactive forms. First, import the Validators symbol.
src/app/hero-detail.component.ts (excerpt)
import { Component } from ‘@angular/core’;
import { FormBuilder, FormGroup, Validators } from ‘@angular/forms’;
To make the name FormControl required, replace the name property in the FormGroup with an array. The first item is the initial value for name; the second is the required validator, Validators.required.
src/app/hero-detail.component.ts (excerpt)
this.heroForm = this.fb.group({
name: [”, Validators.required ],
});
Reactive validators are simple, composable functions. Configuring validation is harder in template-driven forms where you must wrap validators in a directive.
Update the diagnostic message at the bottom of the template to display the form’s validity status.
src/app/hero-detail.component.html (excerpt)
<p>Form value: {{ heroForm.value | json }}</p>
<p>Form status: {{ heroForm.status | json }}</p>
Validators.required is working. The status is INVALID because the input box has no value. Type into the input box to see the status change from INVALID to VALID.
In a real app, you’d replace the diagnostic message with a user-friendly experience.
Using Validators.required is optional for the rest of the guide. It remains in each of the following examples with the same configuration.
Nested FormGroups – This form is getting big and unwieldy. You can group some of the related FormControls into a nested FormGroup. The street, city, state, and zip are properties that would make a good address FormGroup. Nesting groups and controls in this way allows you to mirror the hierarchical structure of the data model and helps track validation and state for related sets of controls.
You used the FormBuilder to create one FormGroup in this component called heroForm. Let that be the parent FormGroup. Use FormBuilder again to create a child FormGroup that encapsulates the address controls; assign the result to a new address property of the parent FormGroup.
src/app/hero-detail.component.ts (excerpt)
export class HeroDetailComponent5 {
heroForm: FormGroup;
states = states;
constructor(private fb: FormBuilder) {
this.createForm();
}
createForm() {
this.heroForm = this.fb.group({ // <– the parent FormGroup
name: [”, Validators.required ],
address: this.fb.group({ // <– the child FormGroup
street: ”,
city: ”,
state: ”,
zip: ”
}),
power: ”,
sidekick: ”
});
}
}
You’ve changed the structure of the form controls in the component class; you must make corresponding adjustments to the component template.
In hero-detail.component.html, wrap the address-related FormControls in a div. Add a formGroupName directive to the div and bind it to “address”. That’s the property of the address child FormGroup within the parent FormGroup called heroForm.
To make this change visually obvious, slip in an <h4> header near the top with the text, Secret Lair. The new address HTML looks like this:
src/app/hero-detail.component.html (excerpt)
<div formGroupName=”address” class=”well well-lg”>
<h4>Secret Lair</h4>
<div class=”form-group”>
<label class=”center-block”>Street:
<input class=”form-control” formControlName=”street”>
</label>
</div>
<div class=”form-group”>
<label class=”center-block”>City:
<input class=”form-control” formControlName=”city”>
</label>
</div>
<div class=”form-group”>
<label class=”center-block”>State:
<select class=”form-control” formControlName=”state”>
<option *ngFor=”let state of states” [value]=”state”>{{state}}</option>
</select>
</label>
</div>
<div class=”form-group”>
<label class=”center-block”>Zip Code:
<input class=”form-control” formControlName=”zip”>
</label>
</div>
</div>
After these changes, the JSON output in the browser shows the revised form model with the nested address FormGroup:

Great! You’ve made a group and you can see that the template and the form model are talking to one another.
