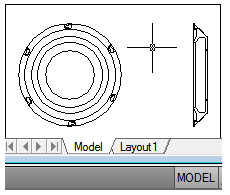
There are two distinct working environments, or “spaces,” in which you can create objects in a drawing. These are represented by the Model and layout tabs.
Typically, a model composed of geometric objects is created in a three-dimensional space called model space. A final layout of specific views and annotations of this model is created in a two-dimensional space called paper space. These spaces are accessible on two or more tabs near the bottom of the drawing area: the Model tab and one or more layout tabs. These tabs can be hidden, appearing instead as buttons on the status bar at the bottom-center of the application window.
Working on the Model tab, you draw a model of your subject at 1:1 scale. Working on a layout tab, you can create one or more layout viewports, dimensions, notes, and a title block to represent a drawing sheet.
Each layout viewport is like a picture frame containing a “photograph” of the model in model space. Each layout viewport contains a view that displays the model at the scale and orientation that you specify. You can also specify which layers are visible in each layout viewport.
After you finish arranging the layout, you turn off the layer that contains the layout viewport objects. The views are still visible, and you can plot the layout without displaying the viewport boundaries.
Layout Process
When you use a layout tab to prepare your drawing for plotting, you follow a series of steps in a process. You design the subject of your drawing on the Model tab (in model space) and prepare it for plotting on a layout tab (in paper space). There is one Model tab and one or more layout tabs at the bottom of the drawing window.
These tabs can be hidden, appearing instead as buttons on the status bar at the bottom-center of the application window.
You can initialize a layout by clicking on its tab to activate the previously unused layout. A layout does not contain any plot settings before initialization. Once initialized, layouts can be drawn upon, published, and added to sheet sets as sheets (after the drawing has been saved).
Process Summary
When you prepare a layout, you typically step through the following process
- Create a model of your subject on the Model tab.
- Click a layout tab.
- Specify layout page settings such as plotting device, paper size, plot area, plot scale, and drawing orientation.
- Insert a title block into the layout (unless you have started with a drawing template that already has a title block).
- Create a new layer to be used for layout viewports.
- Create layout viewports and position them on the layout.
- Set the orientation, scale, and layer visibility of the view in each layout viewport.
- Add dimensions and annotate in the layout as needed.
- Turn off the layer containing the layout viewports.
- Plot your layout.
You can also use annotative objects if you want to annotate your drawing in model space and scale the annotations automatically.
There are several benefits to switching between model space and paper space to perform certain tasks. Use model space for creating and editing your model. Use paper space for composing your drawing sheet and defining views.
