The Facebook SDK for Android is the easiest way to integrate your Android app with Facebook. It enables:
- Facebook Login – Authenticate people with their Facebook credentials.
- Account Kit – Log people in with just their phone number or email address.
- Share and Send dialogs – Enable sharing content from your app to Facebook.
- App Events – Log events in your application.
- Graph API – Read and write to the Graph API.
You have two ways to set up your app to use the Facebook SDK:
- By using Quick Start.
- By setting up manually
Using QuickStart
To get a Facebook App ID, configure your app’s settings, and import the Facebook SDK, access on the link – https://developers.facebook.com/quickstarts
Manual Configuration and Installation
To use Facebook SDK in a project, add it as a build dependency and import it.
- Go to Android Studio | New Project | Minimum SDK
- Select API 15: Android 4.0.3 or higher and create your new project.
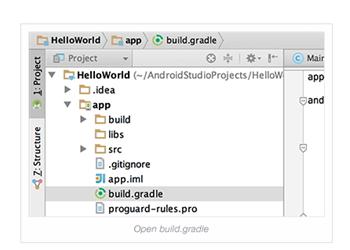
- After you create a new project, open your_app | build.gradle
- Add the following to the buildscript { repositories {}} section of the build.gradle (Project) file:
mavenCentral()
- Add the following to the dependencies {} section of your build.gradle (module: app) file to compile the latest version of the Facebook SDK:
implementation ‘com.facebook.android:facebook-android-sdk:[4,5)’
When you use the Facebook SDK, events in your app are automatically logged and collected for Facebook Analytics unless you disable automatic event logging. For details about what information is collected and how to disable automatic event logging, see Automatic App Event Logging.
- Build your project. Now you can import com.facebook.FacebookSdk into your app.
Add Facebook App ID
Then add your Facebook App ID to your project’s strings file and update your Android manifest:
- Open your strings.xml file. Example path: /app/src/main/res/values/strings.xml.
- Add a new string with the name facebook_app_id and value as your Facebook App ID
- Open AndroidManifest.xml
- Add a uses-permission element to the manifest:
<uses-permission android:name=”android.permission.INTERNET”/>
- Add a meta-data element to the application element:
<application android:label=”@string/app_name” …>
…
<meta-data android:name=”com.facebook.sdk.ApplicationId” android:value=”@string/facebook_app_id”/>
…
</application>
Sending Images or Videos
If you’re sharing links, images or video via the Facebook for Android app, you also need to declare the FacebookContentProvider in the manifest.
Append your app id to the end of the authorities value. For example if your Facebook app id is 1234, the declaration looks like:
<provider android:authorities=”com.facebook.app.FacebookContentProvider1234″
android:name=”com.facebook.FacebookContentProvider”
android:exported=”true” />
Using the Facebook SDK with Maven
You can declare the Maven dependency with the latest available version of the Android SDK:
<dependency>
<groupId>com.facebook.android</groupId>
<artifactId>facebook-android-sdk</artifactId>
<version>PUT_LATEST_VERSION_HERE</version>
</dependency>
