Here’s a visual idea of where this tutorial leads, beginning with the “Dashboard” view and the most heroic heroes:
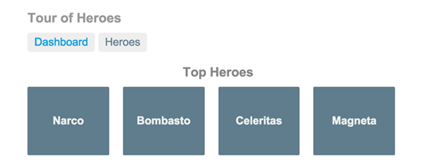
You can click the two links above the dashboard (“Dashboard” and “Heroes”) to navigate between this Dashboard view and a Heroes view.
If you click the dashboard hero “Magneta,” the router opens a “Hero Details” view where you can change the hero’s name.
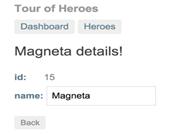
Clicking the “Back” button returns you to the Dashboard. Links at the top take you to either of the main views. If you click “Heroes,” the app displays the “Heroes” master list view.
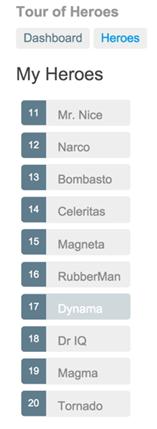
When you click a different hero name, the read-only mini detail beneath the list reflects the new choice.
You can click the “View Details” button to drill into the editable details of the selected hero.
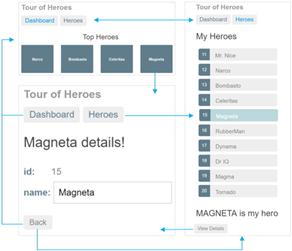
The following diagram captures all of the navigation options.
Next step
You’ll build the Tour of Heroes app, step by step. Each step is motivated with a requirement that you’ve likely met in many applications. Everything has a reason.
Along the way, you’ll become familiar with many of the core fundamentals of Angular.
