There are three main steps to setting up a lazy loaded feature module:
- Create the feature module.
- Create the feature module’s routing module.
- Configure the routes.
Set up an app
If you don’t already have an app, you can follow the steps below to create one with the CLI. If you do already have an app, skip to Configure the routes. Enter the following command where customer-app is the name of your app:
ng new customer-app –routing
This creates an app called customer-app and the –routing flag generates a file called app-routing.module.ts, which is one of the files you need for setting up lazy loading for your feature module. Navigate into the project by issuing the command cd customer-app.
Create a feature module with routing
Next, you’ll need a feature module to route to. To make one, enter the following command at the terminal window prompt where customers is the name of the module:
ng generate module customers –routing
This creates a customers folder with two files inside; CustomersModule and CustomersRoutingModule. CustomersModule will act as the gatekeeper for anything that concerns customers. CustomersRoutingModule will handle any customer-related routing. This keeps the app’s structure organized as the app grows and allows you to reuse this module while easily keeping its routing intact.
The CLI imports the CustomersRoutingModule into the CustomersModule by adding a JavaScript import statement at the top of the file and adding CustomersRoutingModule to the @NgModule imports array.
Add a component to the feature module
In order to see the module being lazy loaded in the browser, create a component to render some HTML when the app loads CustomersModule. At the command line, enter the following:
ng generate component customers/customer-list
This creates a folder inside of customers called customer-list with the four files that make up the component. Just like with the routing module, the CLI imports the CustomerListComponent into the CustomersModule.
Add another feature module
For another place to route to, create a second feature module with routing:
ng generate module orders –routing
This makes a new folder called orders containing an OrdersModule and an OrdersRoutingModule. Now, just like with the CustomersModule, give it some content:
ng generate component orders/order-list
Set up the UI
Though you can type the URL into the address bar, a nav is easier for the user and more common. Replace the default placeholder markup in app.component.html with a custom nav so you can easily navigate to your modules in the browser:
src/app/app.component.html
<h1>
{{title}}
</h1>
<button routerLink=”/customers”>Customers</button>
<button routerLink=”/orders”>Orders</button>
<button routerLink=””>Home</button>
<router-outlet></router-outlet>
To see your app in the browser so far, enter the following command in the terminal window:
ng serve
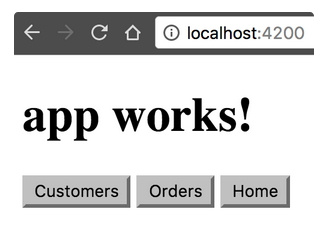
Then go to localhost:4200 where you should see “app works!” and three buttons.
To make the buttons work, you need to configure the routing modules.
Configure the routes
The two feature modules, OrdersModule and CustomersModule, have to be wired up to the AppRoutingModule so the router knows about them. The structure is as follows:

Each feature module acts as a doorway via the router. In the AppRoutingModule, you configure the routes to the feature modules, in this case OrdersModule and CustomersModule. This way, the router knows to go to the feature module. The feature module then connects the AppRoutingModule to the CustomersRoutingModule or the OrdersRoutingModule. Those routing modules tell the router where to go to load relevant components.
