Functionalities of Appium Desktop
Appium Desktop is an app developed for Mac, Windows, and Linux. Moreover, the Appium Desktop gives you the power of the Appium automation server in a flexible UI. It is considered as a combination of a few Appium-related tools including –
- Graphical interface for the Appium Server.
- Inspector that you can use to look at your app’s elements.
How to download Appium Desktop?
You must always pick up the latest release from the Release page on GitHub (https://github.com/appium/appium-desktop/releases/latest).
Using Windows or macOS
In case you are on Windows or macOS, Appium, then desktop will automatically provide you with updated versions of the app. But if you are facing any problem updating, then simply delete or uninstall the app and re-download the latest version.
You must remember Appium Desktop is not the same thing as Appium. Appium Desktop is a graphical frontend to Appium with additional tools. Appium Desktop is released on its own cadence and has its own versioning system. If you are reporting an issue with Appium Desktop, always be sure to include both the version of Appium Desktop and the version of the Appium Server which is in use.
Usage Instructions for Appium Desktop
The use of these instructions assume that you are already familiar with Appium and Appium-related concepts. Further, this app provides a convenient way to download and run the Appium automation server, as well as a tool for inspecting your Android or iOS application.
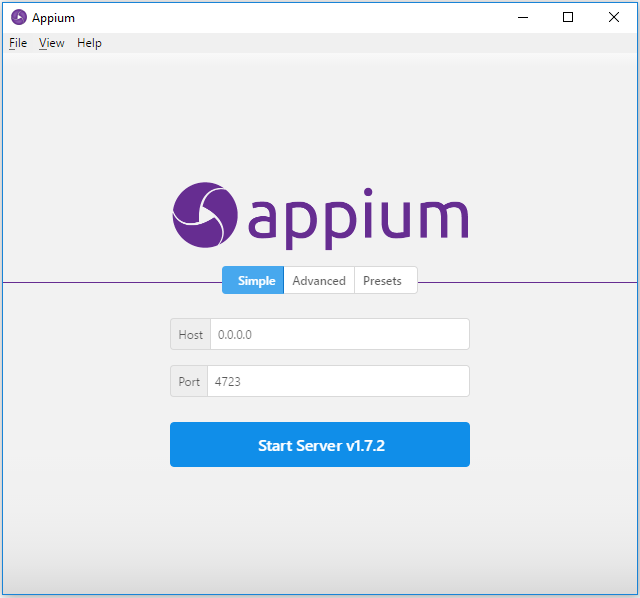
How to start a simple server?
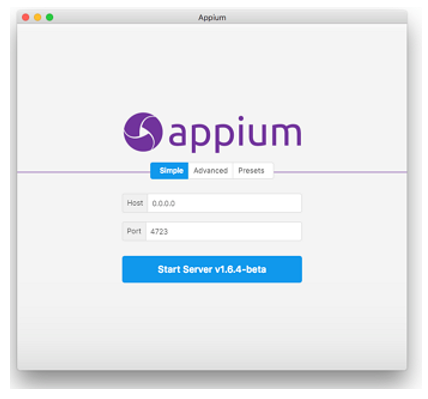
Now, when you will open Appium Desktop, you are greeted with the server start window. Therefore one of the basic option is to start an Appium server with all its defaults and the ability to modify the host and port. Also, the start button will confirm the version of the Appium server you are running. Further, it will be useful when reporting issues to the Appium team.
How to start a server with advanced options?
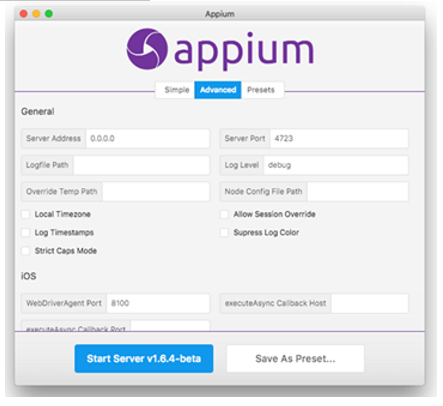
In order to start a server with advanced options, click on the ‘Advanced’ tab. This will help you to set all the server flags that are available in Appium.
How to use Server presets?
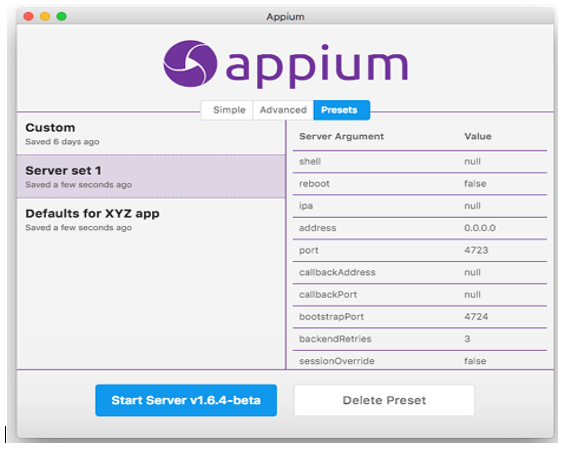
Server preset gives you the knowledge and usage of advanced server options. The Server preset gives you the ability to save a configuration for later use. Therefore, simply save the preset on the ‘Advanced’ tab, and you will subsequently be able to recall and start the server with that configuration from the ‘Preset’ tab.
Server console output window
After starting the server, it will launch on the host and port you specified, and open a new window displaying the server log output.
What is Server console?
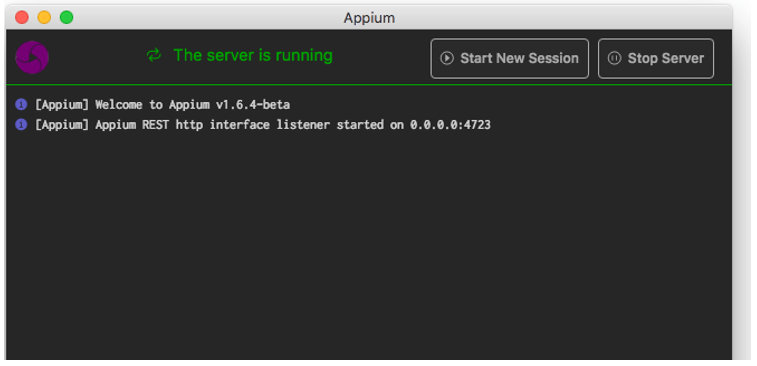
Server console is fairly straightforward and no real interaction is possible, beyond using the button to stop the server. Further, you can also copy-and-paste the logs from this window which is useful in reporting Appium issues.
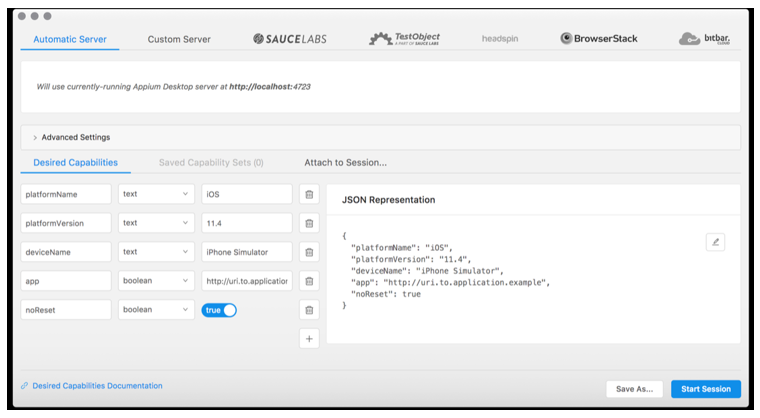
Start New Session button is primarily used to open up the New Session window, thereby enabling you to start an inspector session on the currently-running server.
What is a New Session Window?
New Session window permit you to construct a set of Appium desired capabilities. These are used to launch an Appium session. Also, you can launch a session against the currently-running Appium Desktop server, or you can launch a session against a variety of other endpoints.
Remember, you can get to the New Session window without starting an Appium Desktop server. Then, go to “File” (Windows/Linux) or “Appium” (Mac) and choose “New Session…”, which will open the New Session window without having to start a local server.
Purpose of Appium Endpoints
Appium Endpoints are the options for launching a session against a non-local Appium server.
| Endpoint | Description |
| Automatic server | Automatically utilizes the currently-running Appium server |
| Custom Server | Launch a session on an Appium server running on another machine over the network |
| Sauce Labs | Launch a session on the Sauce Labs cloud. |
| TestObject | Launch a session on the TestObject cloud. |
| Headspin | Launch a session on the Headspin cloud. |
| BrowserStack | Launch a session on the Browserstack cloud. |
| Bitbar | Launch a session on the Bitbar cloud. |
| Kobiton | Launch a session on the Kobiton cloud. |
| Perfecto | Launch a session on the Perfecto cloud. |
| Pcloudy | Launch a session on the Pcloudy cloud. |
| TestingBot | Launch a session on the TestingBot cloud. |
Desired Capabilities
Desired capabilities are primarily used to configure your Appium session. Moreover, they tell the Appium server the type of platform and app you want to automate. Additionally, if you’re using one of the cloud providers, consult their for possible vendor-specific details.
Appium Desktop does not restrict your creation of desired capabilities in any way, nor will it validate them for you. The sole objective of appium desktop is to provide a nice UI for entering them in, and saving them for later use. Further, under the ‘Desired Capabilities’ tab, you can use the form fields and ‘+’ button to enter as many desired capabilities as you need. You will also see a representation of the resulting JSON, which is what is actually sent to the Appium server. This can be useful for verifying your capabilities, or for copy-and-pasting when reporting issues.
How to attach to an existing session?
In order to attach an existing session, click on the Attach to Session, then select an existing session from a list of currently running sessions on your selected server. Else you can input a session ID of a currently-running session. Further, attaching to an existing session is possible because the Inspector is just an Appium client. This could be useful if you want to debug the middle of a running test. But, when you quit the Inspector window of an existing session, Appium Desktop will not quit the session as it does normally.
Inspector
Inspector is a visual representation of the state of your application along with the ability to perform certain interactions in your application through Appium.
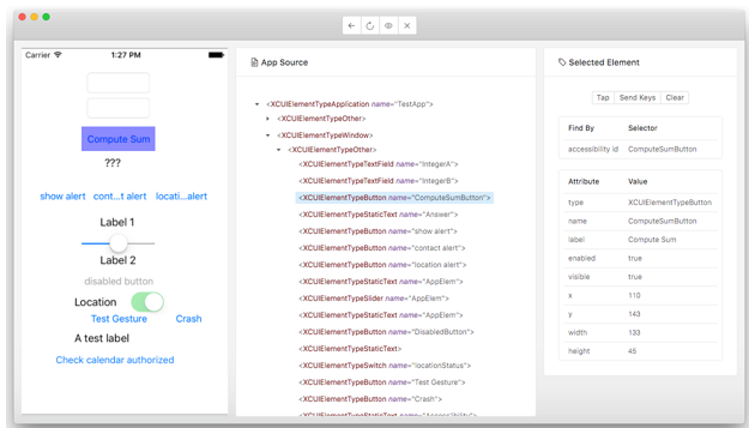
Inspector window contains a small toolbar with icons representing the ability to take certain actions in the Inspector –
- Back (call driver.back)
- Refresh (refresh the source and screenshot)
- Start Recording (open the recorder)
- Quit the session (call driver.quit and close the Inspector)
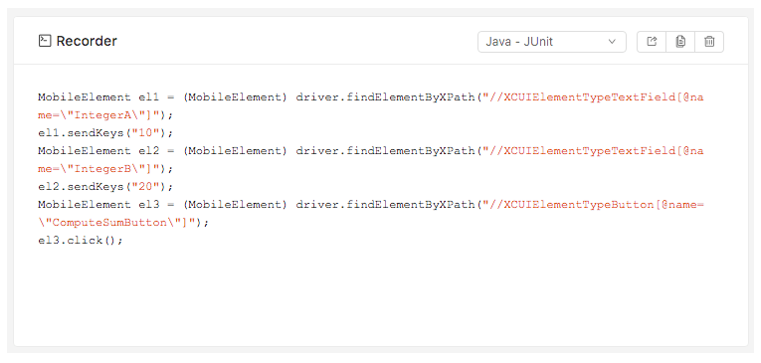
Recorder
Appium Desktop gives a very basic action recorder, that watches for actions taken using Appium Desktop. The recorder displays language-and-framework-specific code that represents those actions. Further, this code can then be copied-and-pasted into the appropriate Appium client code and used for tests.
Following window will be displayed when you start recording, by the Inspector –
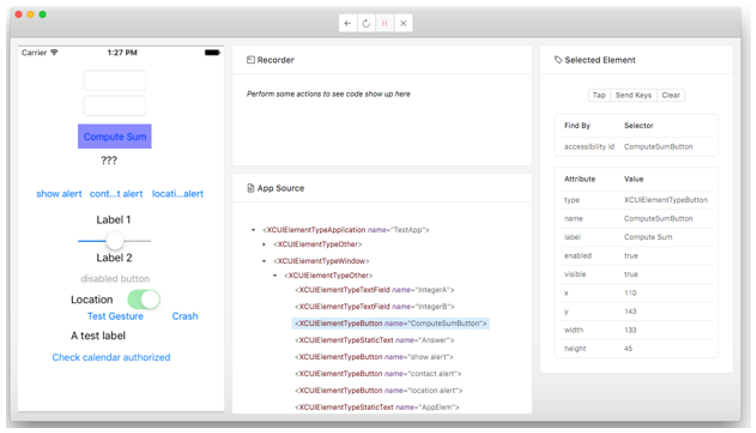
At first, the Recorder will show no code. You will first have to take some action, like finding an element in the hierarchy and tapping on it, or sending keystrokes to it. When you do this, code will appear in the recorder window, corresponding to the particular language and framework you have chosen (which can be adjusted in the drop-down menu at the top right of the Recorder):
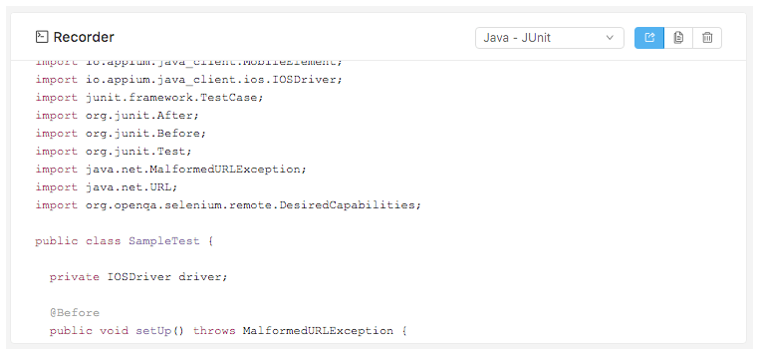
On which case, the power of the recorder will continue to grow as we add more languages, frameworks, and actions to Appium Desktop.
